Understanding Training Zones and When to Use Each
Learn what each training zone does and when to use it. Understanding intensity zones helps improve performance, recovery, and overall fitness
By
April 22, 2026
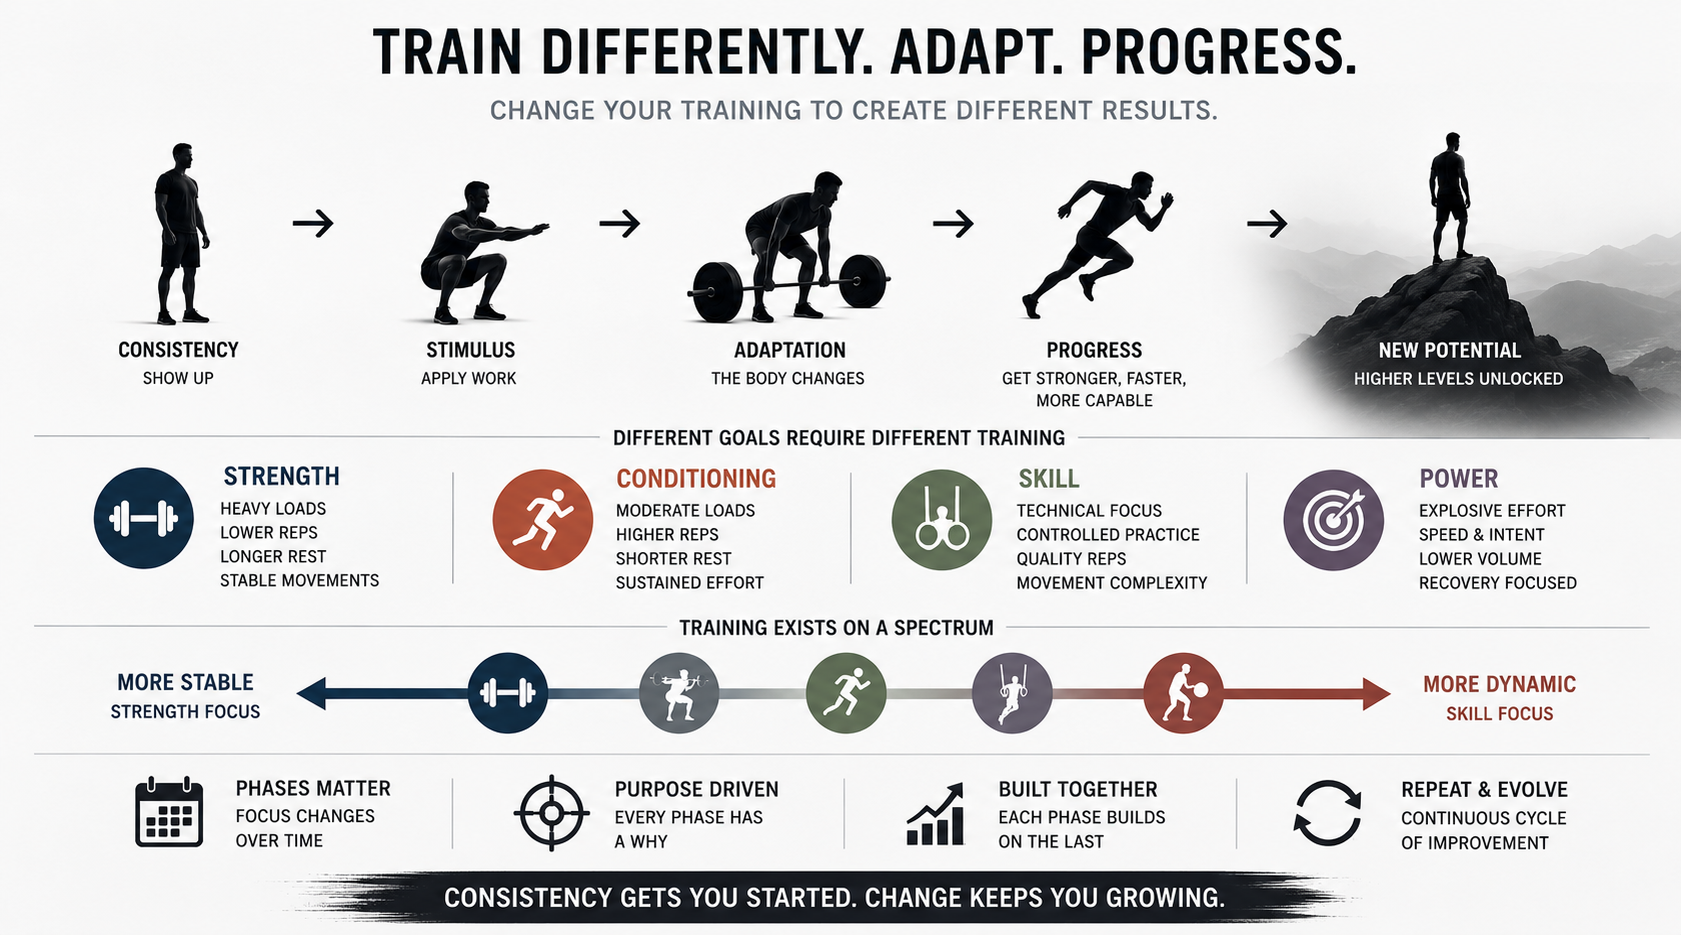
Not all effort is the same.
Some workouts leave you breathing hard and moving fast. Others feel controlled and sustainable. Some are short and explosive, while others are steady and consistent.
These differences are not random.
They are the result of training in different intensity zones.
Understanding what each zone does helps explain why workouts are structured the way they are and why not every day is meant to feel the same.
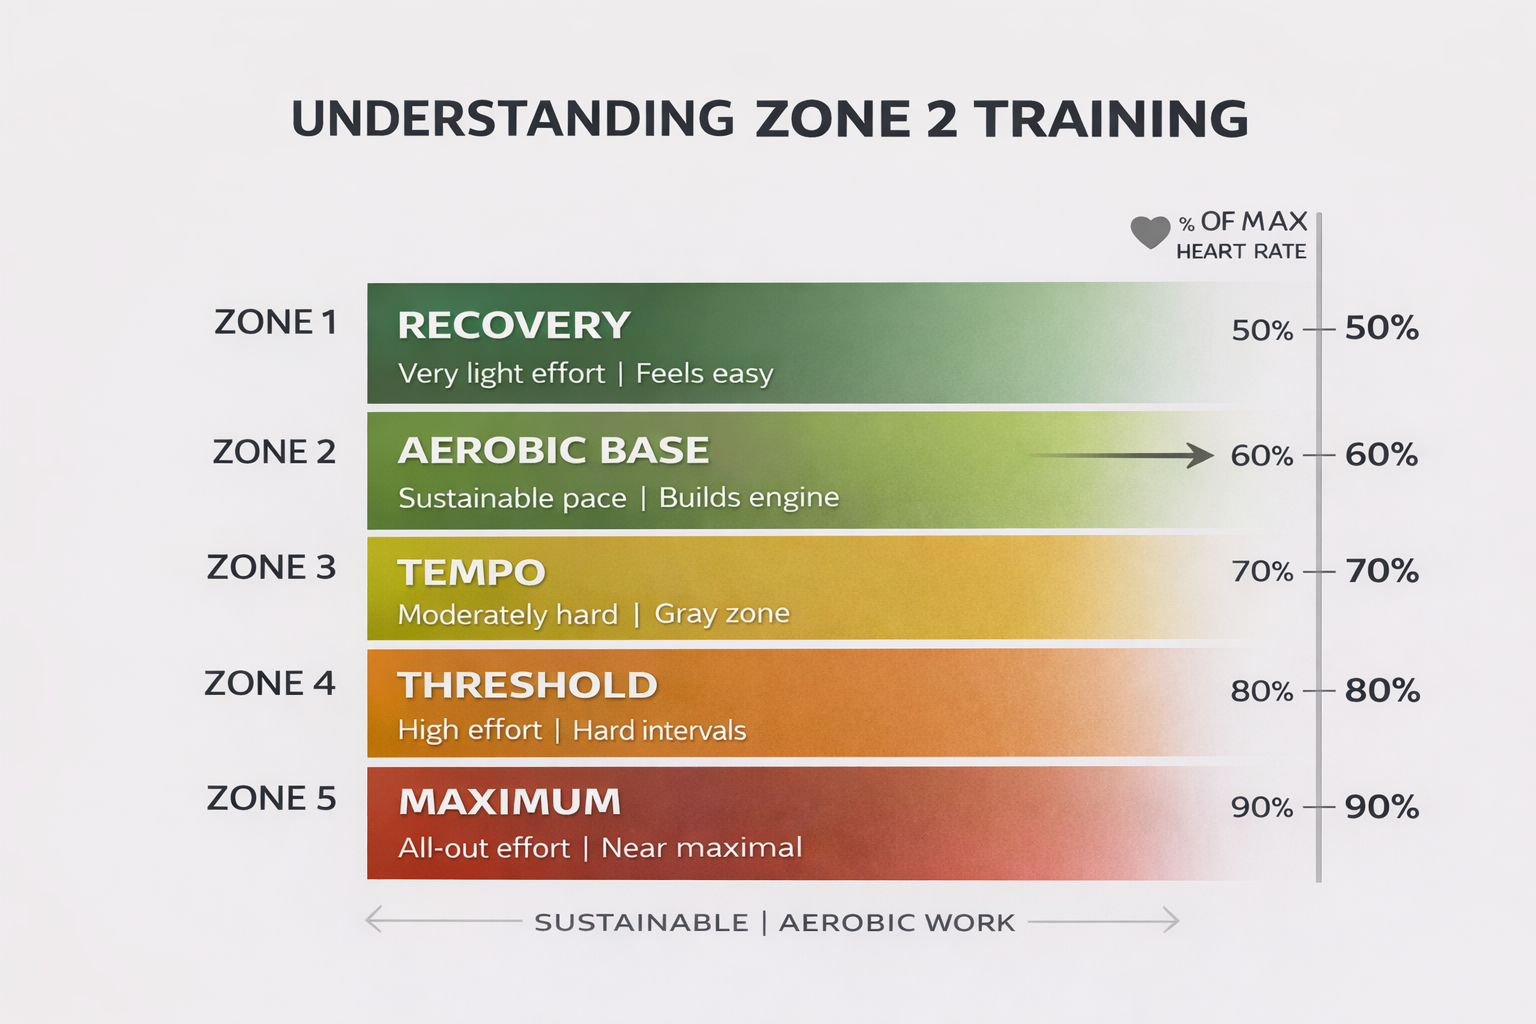
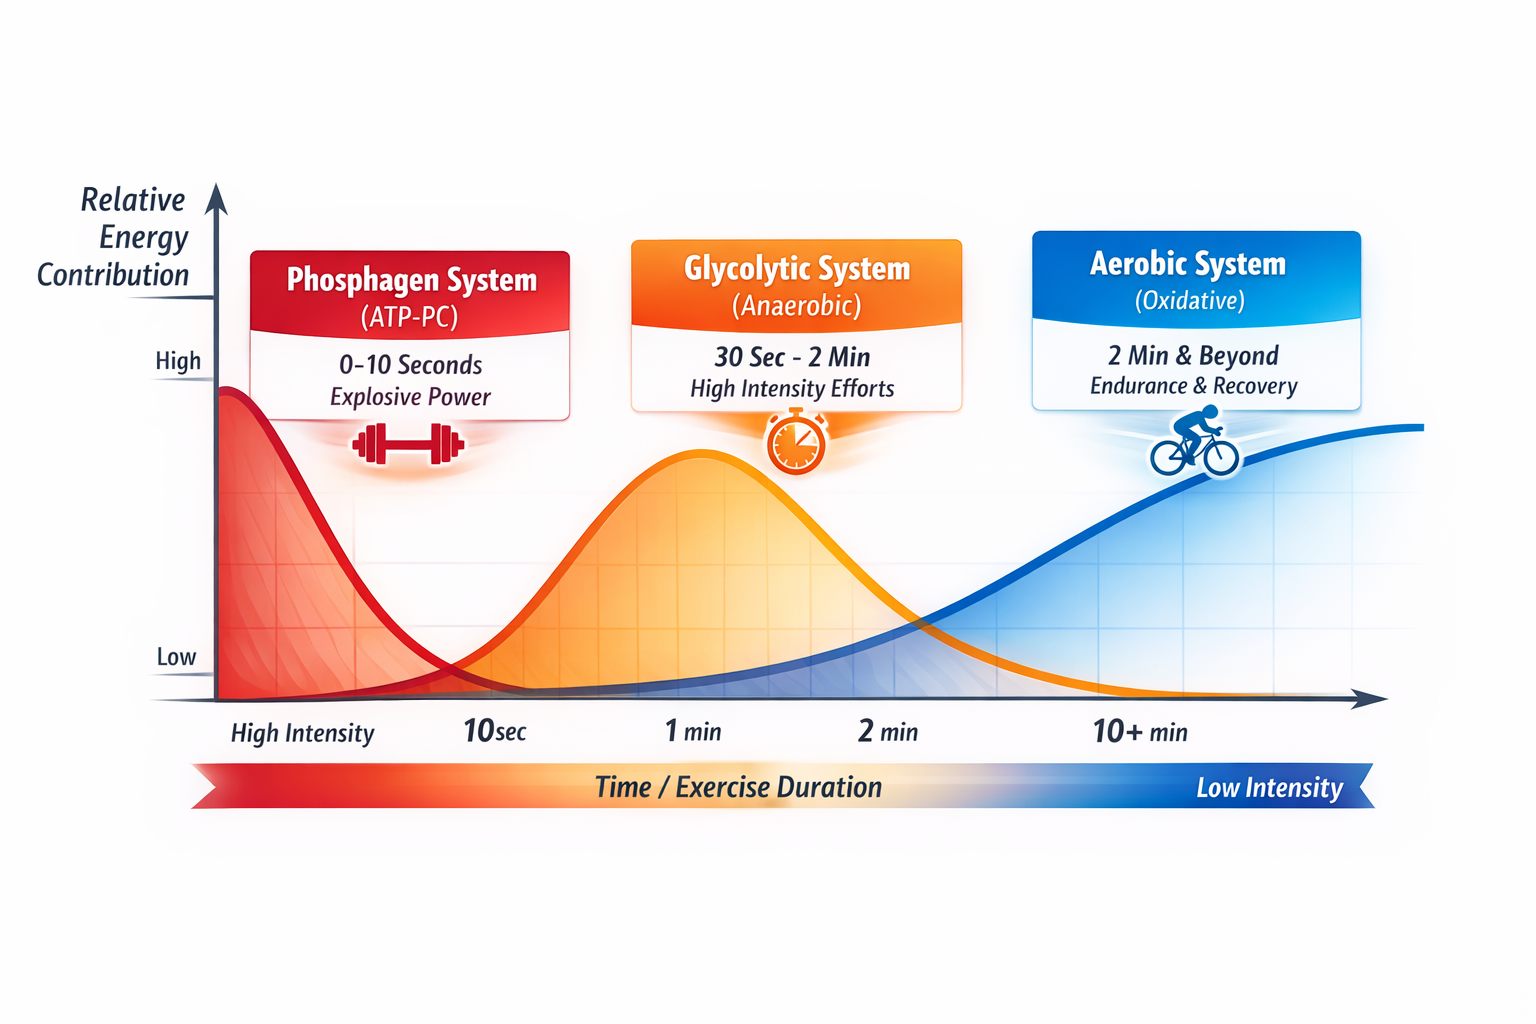
Training zones are a way to describe effort.
They are typically based on heart rate, breathing, and overall intensity. Each zone represents a different level of demand on the body.
As intensity increases, the body shifts how it produces and uses energy.
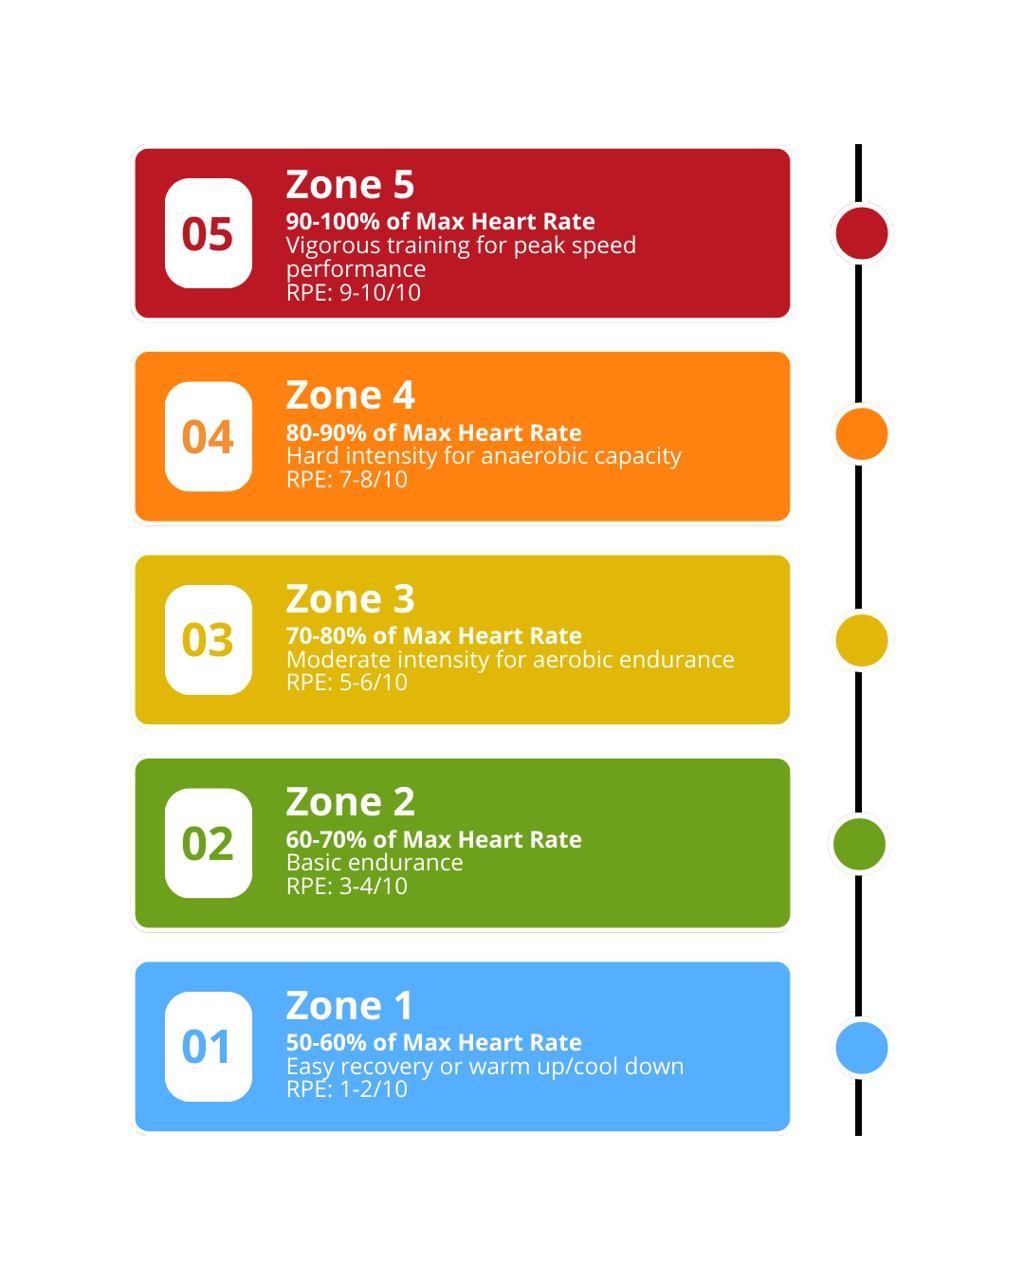
Each zone develops a different quality.
This is very light effort.
It is used for:
Breathing is easy. You can hold a full conversation without effort.
This zone helps promote recovery without adding stress. It allows the body to reset while still moving.
This is steady, controlled effort.
It is used for:
Breathing is elevated but manageable. You can still speak in short sentences.
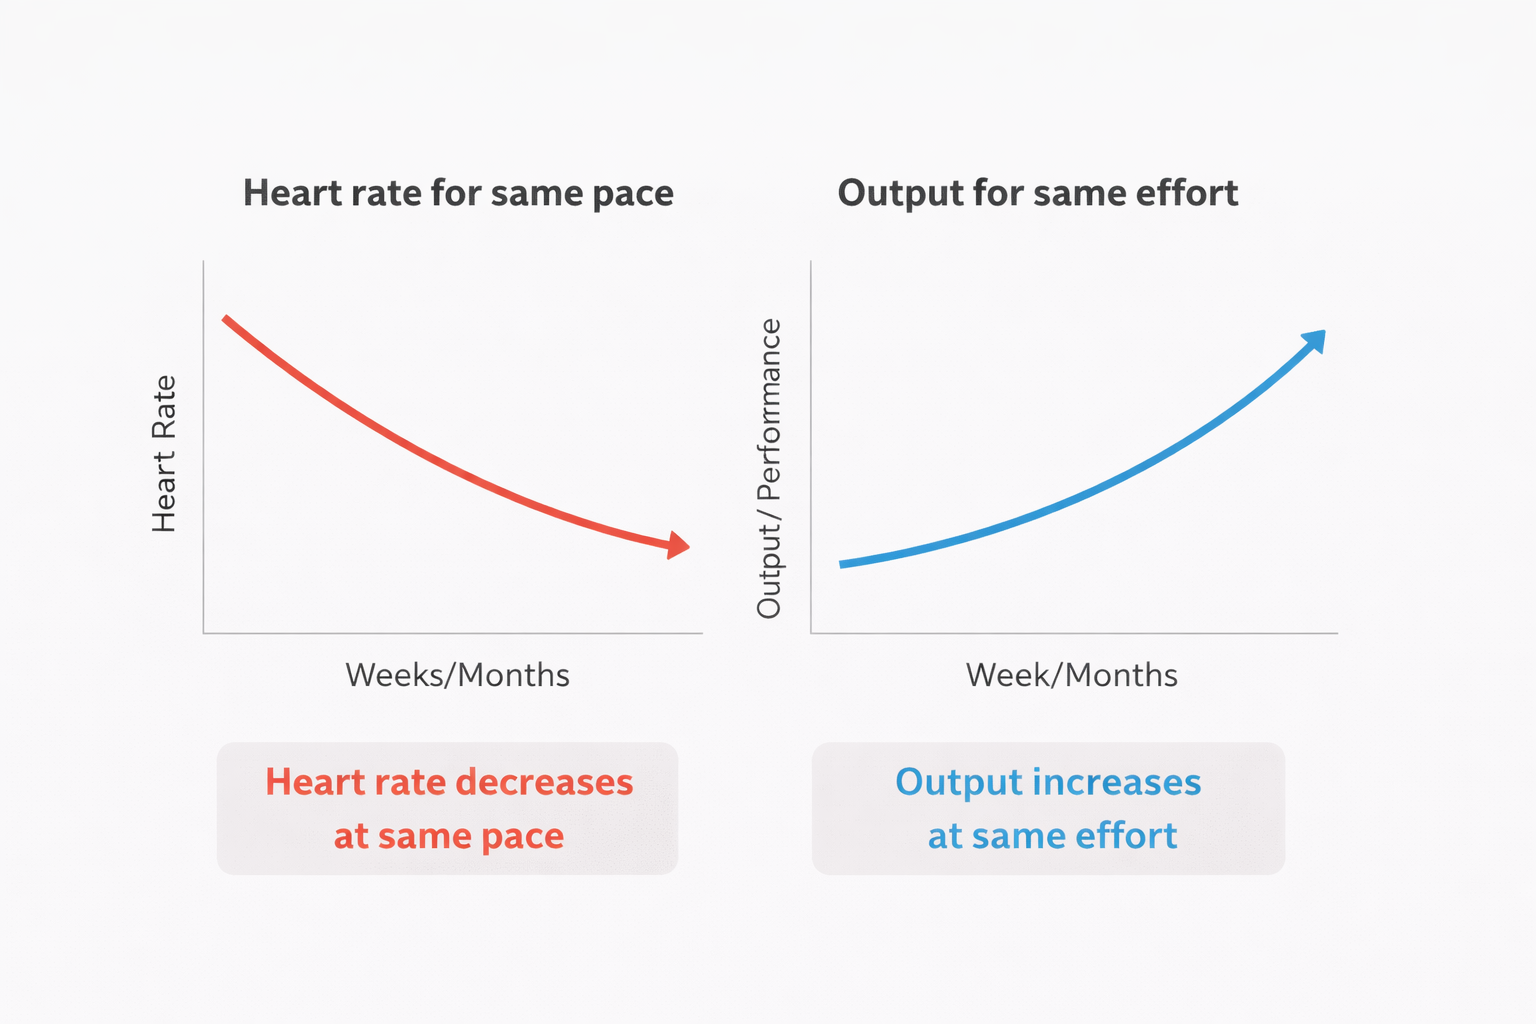
This is the foundation of aerobic fitness and one of the most important zones for long-term development.
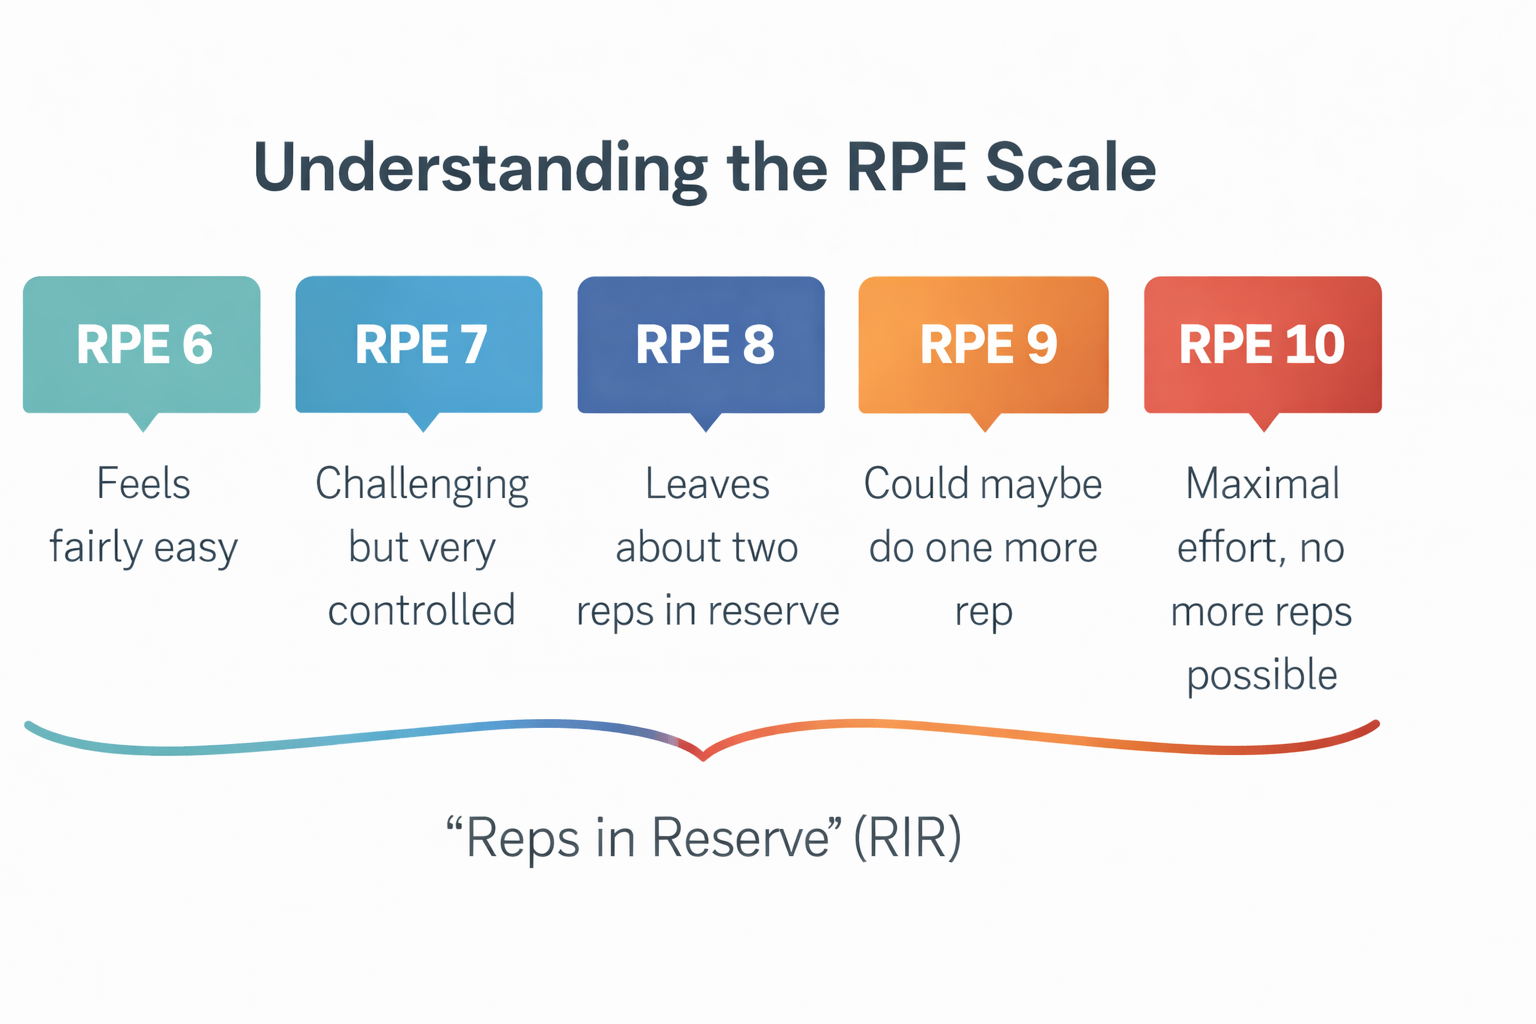
This is where effort starts to feel uncomfortable.
It is used for:
Breathing becomes more labored. Conversation is limited.
This zone has a place, but it is often overused when workouts are not paced correctly.
This is hard effort.
It is used for:
Breathing is heavy. Talking is difficult.
This zone drives performance but requires recovery.
This is near all-out effort.
It is used for:
It cannot be sustained for long.
This zone develops peak power and output, but it is used sparingly due to the stress it creates.
No single zone is enough on its own.
Each one develops a different part of your fitness:
Training across zones creates balance.
This is what allows athletes to:
Your program is designed to use different zones on different days.
Some sessions are meant to feel controlled.
Some are meant to feel challenging.
Some are meant to push intensity.
The goal is not to stay in one zone.
It is to develop all of them over time.
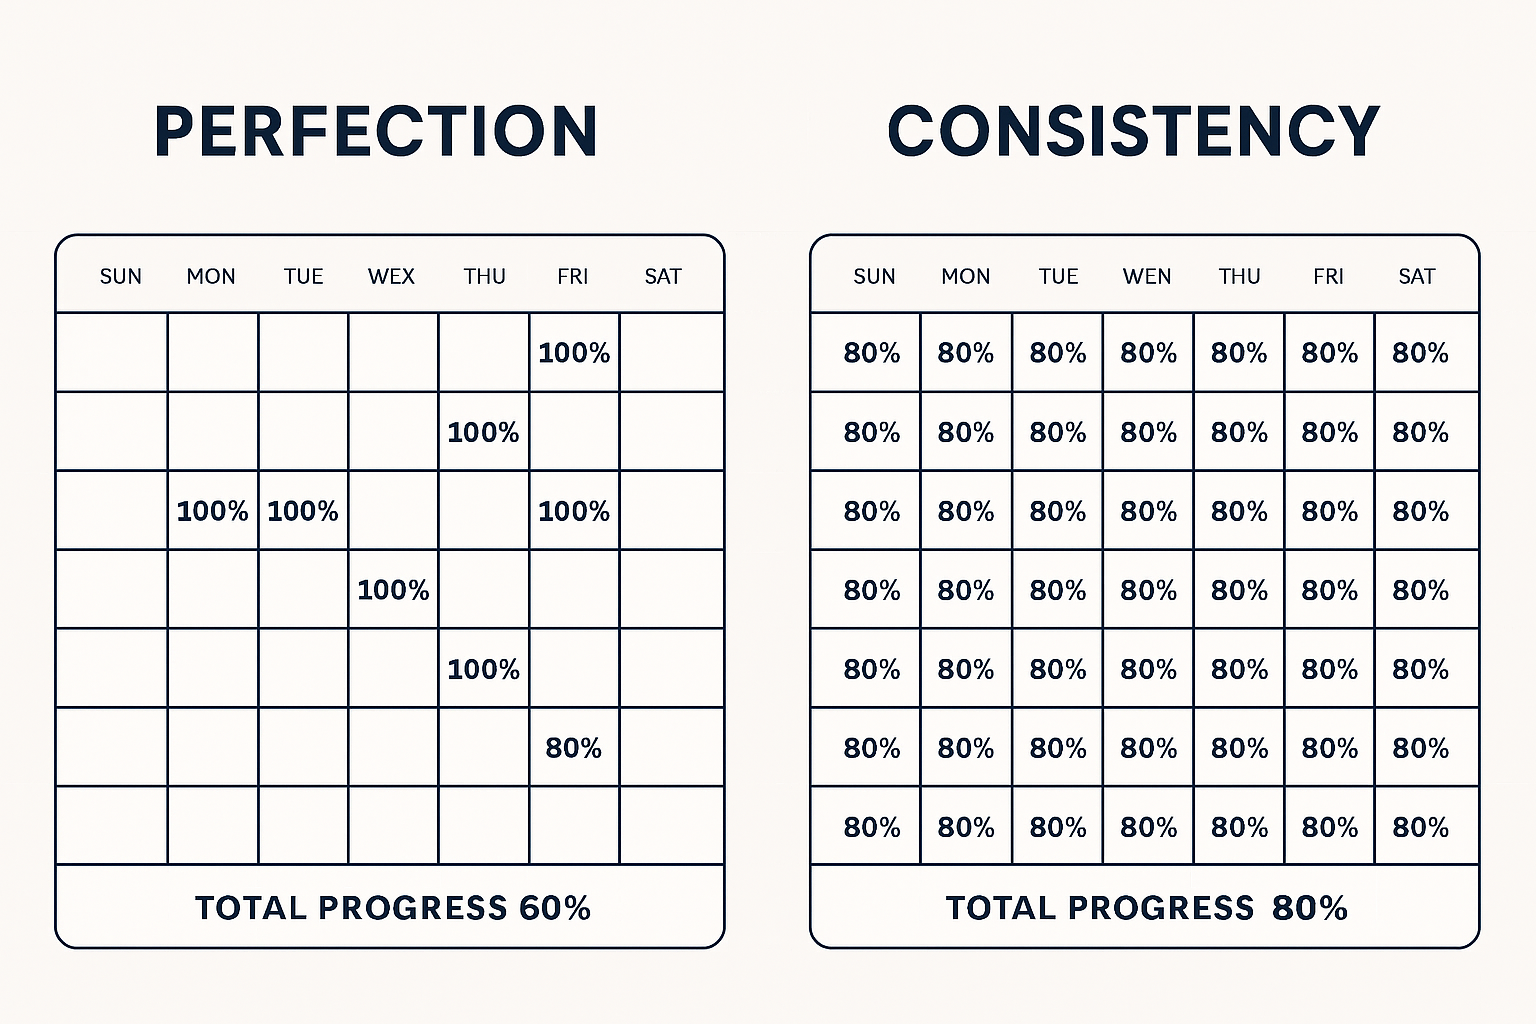
Many athletes drift into the middle.
They push easy days too hard and approach hard days without enough intention.
This leads to:
Understanding zones helps you match effort to the purpose of the workout.
Training is not about going hard all the time.
It is about applying the right level of effort at the right time.
When each zone is used correctly, progress becomes more consistent and sustainable.
Every zone has a purpose.
The key is knowing when to use each one.
When effort matches intent, training becomes more effective and results follow.